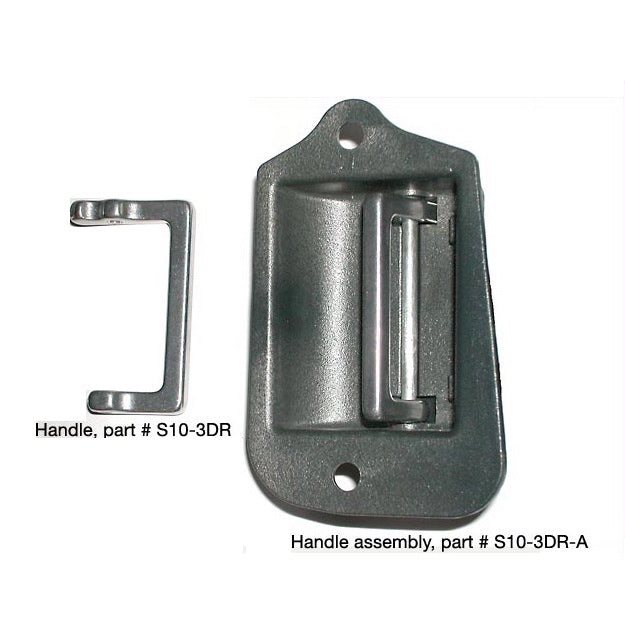
s1c2d3
Aluminum third-door handle for 1995–2003 Chevy S10 & GMC Sonoma
Aluminum third-door handle for 1995–2003 Chevy S10 & GMC Sonoma
Couldn't load pickup availability
Why You Might Need One. The handles for an S10 and GMC Sonoma third-door (cargo door) are injection molded plastic. While cheap to manufacture and rattle-free, they are notorious for breaking. See below.
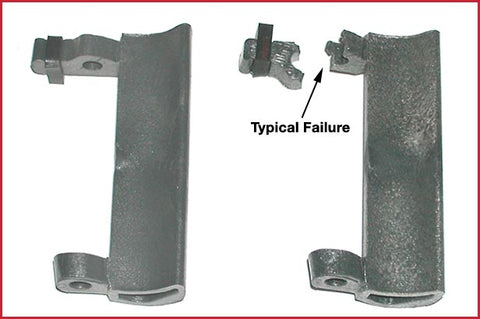
Why JTR Stealth? Stealth Conversion’s replacement third-door handle is made in America from heat-treated aircraft aluminum, which will not break.
What to Order. You have a choice of ordering and installing the handle alone or the complete GM handle assembly with our aluminum handle installed, which simplifies installation in the vehicle.
Installation. If ordering the complete assembly, you skip the intricate work of steps 5 and 6.
Tools Required
- T-30 torx
- small knife or small flat screwdriver (not shown)
- needle nose pliers (bent nose preferred)
- socket (not needed for installing complete handle assembly)
- 1/8" or 3/16" punch (a small screwdriver or a nail can be substituted)
and small hammer (not needed for installing complete handle assembly)
1. Remove Handle Assembly
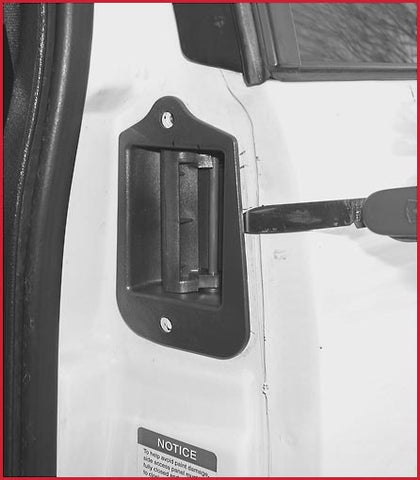
Remove the screws with a torx driver (size T-30).
After removing the torx screws, use a small knife (or small screwdriver) to gently pry the handle assembly from the door.
2. Remove the Clip
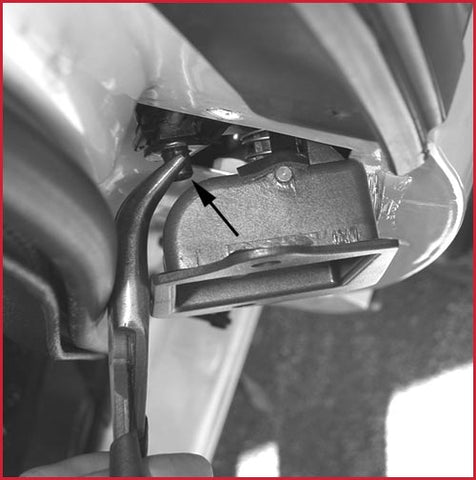
Maneuver the handle assembly to get access at the plastic retaining clip (arrow).
Gently squeeze the retaining clip with a needle-nose pliers, as shown, so it can be detached from the handle assembly.
3. Remove the Second Clip

Maneuver the handle assembly as shown, for access to the second clip.
After removing the second retaining clip, remove the handle assembly from the door.
4. Remove Pivot Pin (Not required if purchasing complete assembly S10-CA)
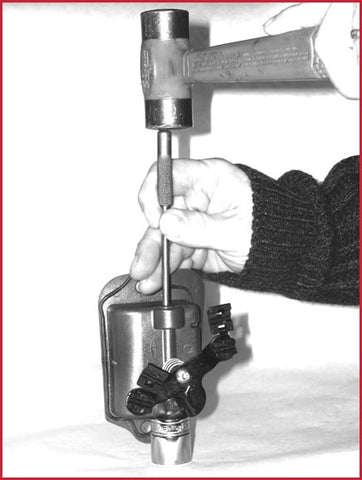
Place the handle assembly up-side-down on top of a socket, as shown, so the pivot pin can be removed.
Gently hammer on the pivot pin with a 1/8" or 3/16" punch as shown. A nail or a small screw-driver can also be used.
Do not use pliers to remove the pivot pin from the housing, or it may nick the pivot pin, and cause installation problems.
5. Fit Pivot Pin Into Handle and Grease (Complete assembly S10-CA comes pre-fitted and greased)
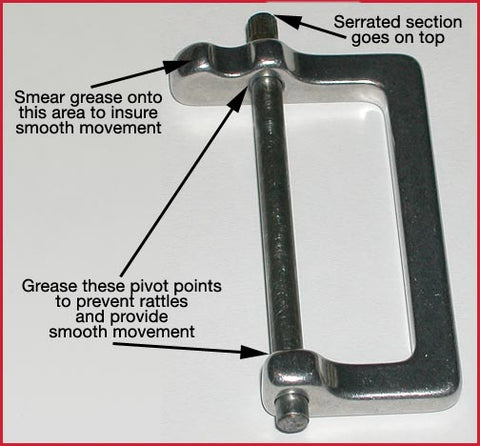
Test fit the pivot pin into the aluminum handle as shown to insure that it slides into place, and spins easily.
If the pivot pin does not easily slide into the handle, check for nicks or scratches on the pivot pin. If any nicks or scratches are found, use a file or sandpaper to smooth the rough spots.
After insuring the pivot pin slides into the aluminum handle, put some grease in the pivot holes, and the area the arrow points to.
Install the aluminum handle into the plastic housing.
Install the pivot pin, noting that the serrated portion of the pin goes on top.
Gently tap the pivot pin into the plastic housing until it is fully seated.
6. Install Handle Assembly
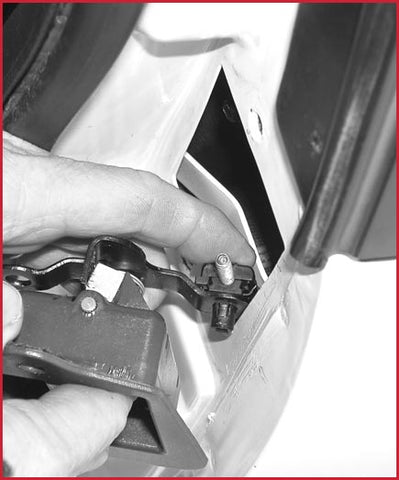
Install the plastic clips onto the handle assembly.
First, attach the lower rod to the handle, as shown, using your finger to seat the retaining clips.
Next, attach the upper rod.
Maneuver the handle assembly into the door.
7. Finish Installation
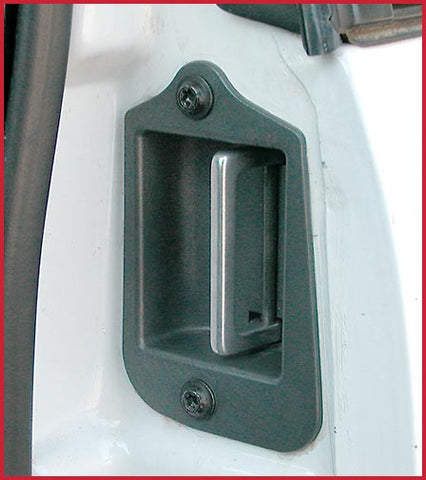
Fasten the handle assembly to the door with the torx screws, and verify the handle works properly.
If the door does not open properly, remove the handle assembly and adjust the position of the plastic retaining clips on the pull rods.
The finished installation has an attractive appearance. Note that the handle provides plenty of finger clearance, unlike other after-market aluminum handles currently sold.
Share
