s1c1d7Alignment
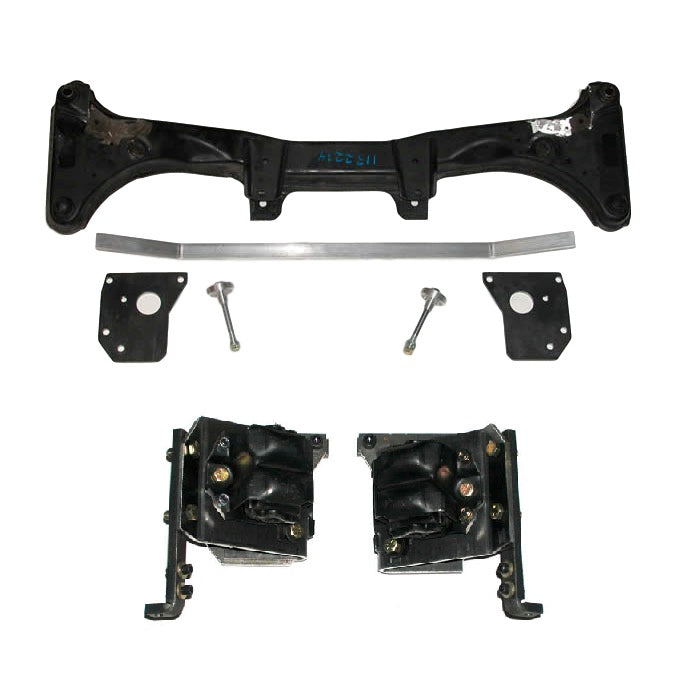
BMW E36 LSX Motor Mounting Kit
BMW E36 LSX Motor Mounting Kit
Couldn't load pickup availability
Why You Might Want One. Using the balljoint bolts to mount the engine is potentially dangerous. Our kit requires more work but pays off in reduced vibrations coming into the car and the additional safety of not using the balljoint bolts for installation.
Notes on the Installation. Our mounting kit requires removing the stock BMW engine mounting pads on the rear of the subframe. This is done primarily to improve header clearance. The increased room for the header makes it easier to use the stock steering shaft.
The design of the mounting kit distributes load to the frame rails to prevent fatiguing the crossmember. The wide distance between motor mounts reduces the amount of engine twist for a given torque, reducing problems with headers banging into the steering shaft and brake booster.
The mounting kit uses 1984-1991 Chevrolet Corvette isolators to reduce vibrations going into the car. These mounts are fairly stiff, and limit engine movement.

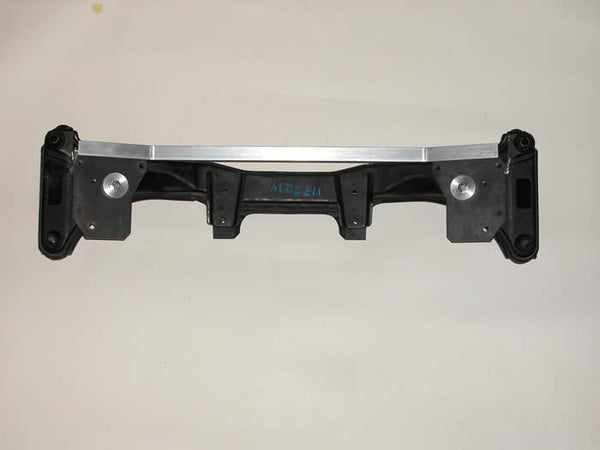
The stock E36 crossmember is on the left. The center crossmember has stock E36 mounting pads removed. This provides 1-1/2" additional room for headers.
The right side crossmember has a prototype mounting pad installed, and a 1" x 2" hole for inserting attachment hardware.
 The transmission crossmember assembly is shown above. Note that the thick center section is mounted below the horizontal side pieces.

After removing the stock E36 engine mounting pad from the front subframe, and enlarging the stock hole to a 1" x 2" rectangular hole, install the adapter plates to the subframe, using the pieces shown above to align the pads onto the front subframe, as shown below.
Enlarge the stock hole in the subframe to a 1" wide x 2" long rectangular hole (as shown below), as this is required to install fastening hardware inside the subframe.

Use a 3/8" drill bit to drill holes on the marked spots. Be sure to deburr the inside of the subframe so that the attachment hardware fits flush to the inside of the subframe.
Temporarily install the mounting pads onto the subframe, and double check the alignment. If the 3/8 holes drilled into the subframe are not properly located, use a file or die grinder to elongate the holes to the proper location.
Paint the subframe with semi-gloss black engine enamel to prevent rusting. Semi-gloss black paint matches the stock BMW paint very well.

Insert the bar with the two threaded holes into the subframe through the 1" x 2" rectangular hole, and screw the 3/8-16 socket head cap screws into the back two holes.
Insert a 3/8-16 nut into the subframe, and screw the front socket head cap screw into the nut. Insert a 9/16 wrench through the 1" x 2" rectangular hole to hold the 3/8-16 nut while tightening the socket head capscrew..
If you have problems doing the above, turn the subframe up-side-down, and allow gravity to hold the bar into place.
Remove one socket head capscrew, install blue Loctite onto the screw, and reinstall. Repeat with the other socket head cap screws. Tighten the socket head cap screws to 35 ft-lbs.

Put a piece of aluminum tape over the 1" x 2" rectangular hole as shown. If you don't do this, you will probably drop a nut or bolt into the subframe when it is installed in the car.
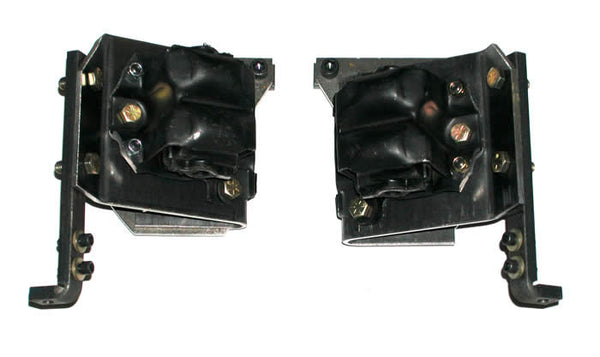
Below are views of the left and right motor mounts included in the kit.


Drill holes into the frame rail, as shown below (Two 5/16" holes and one 1/2" hole), using the "frame insert" as the template.

Install the "frame rail insert" into the frame rail with the threaded rod.

Insert the bar with the tapped holes into the frame rail as shown below.

Attach the 1/4-20 socket head cap screws first. Do not tighten. This will allow you to move the frame insert slightly, when installing the 3/8-16 bolts that attach the motor mount pad to the frame rails. 
Driver's side shown above. Passenger's side shown below.

Mounts have slotted holes to allow adjusting engine position side-to-side, and front-to-back. The height of engine can be adjusted by installing shims or spacers between engine and adapter, or between rubber isolator, and frame adapter bracket. This allows for optimum engine position to prevent the engine from contacting the subframe, frame rails, and steering shaft.

Make use of the slotted holes in the mounts to allow adjusting engine position side-to-side, and front-to-back. The height of engine can be adjusted by installing shims or spacers between engine and adapter, or between the rubber isolator and frame adapter bracket. This allows for optimum engine position to prevent the engine from contacting the subframe, frame rails, and steering shaft.